5 Tips for runners to avoid a trip to the Physio!

2021-01-12Physio Tips, Uncategorized No Comments

5 tips for runners to avoid another visit to the Physio!


Runners accumulate an amazing amount of distance over a 12-month period. The gradual load this has on joints, ligaments, muscles and bones can inevitably lead to injuries. A whopping 82% of all runners will get injured throughout their running career.


Our goal at The Physio Depot is to give you strategies and training tips that educate you on how to lower your risk of injury, therefore keeping you running all year round. We all know what runners are like when they don’t run… If you don’t know what I mean, ask your friends or partners (Yes, we are talking about you Mr/Mrs Grouchy!).

Here are our 5 top tips for a happy and injury free running season in 2021!


  1. Slow & steady wins the race:

    Build your training kilometres up slowly. We often see people jumping up to 40-60km per week after only training for 4-6 months and they wonder why their body is hating it.
  2. Strength wins over stretching:


    Most runners gravitate to stretching or foam rolling for managing their injuries. What we see is a neglect of strength work when runners are pain free. Our view is that strength training should be a consistent theme throughout the whole training year. All running injuries are treated with an element of strengthening exercises, so why not do it before an injury occurs.

  3. Footwear that suits your feet:


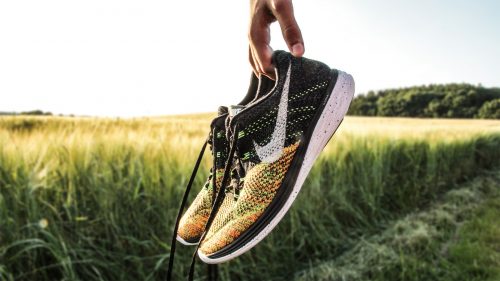
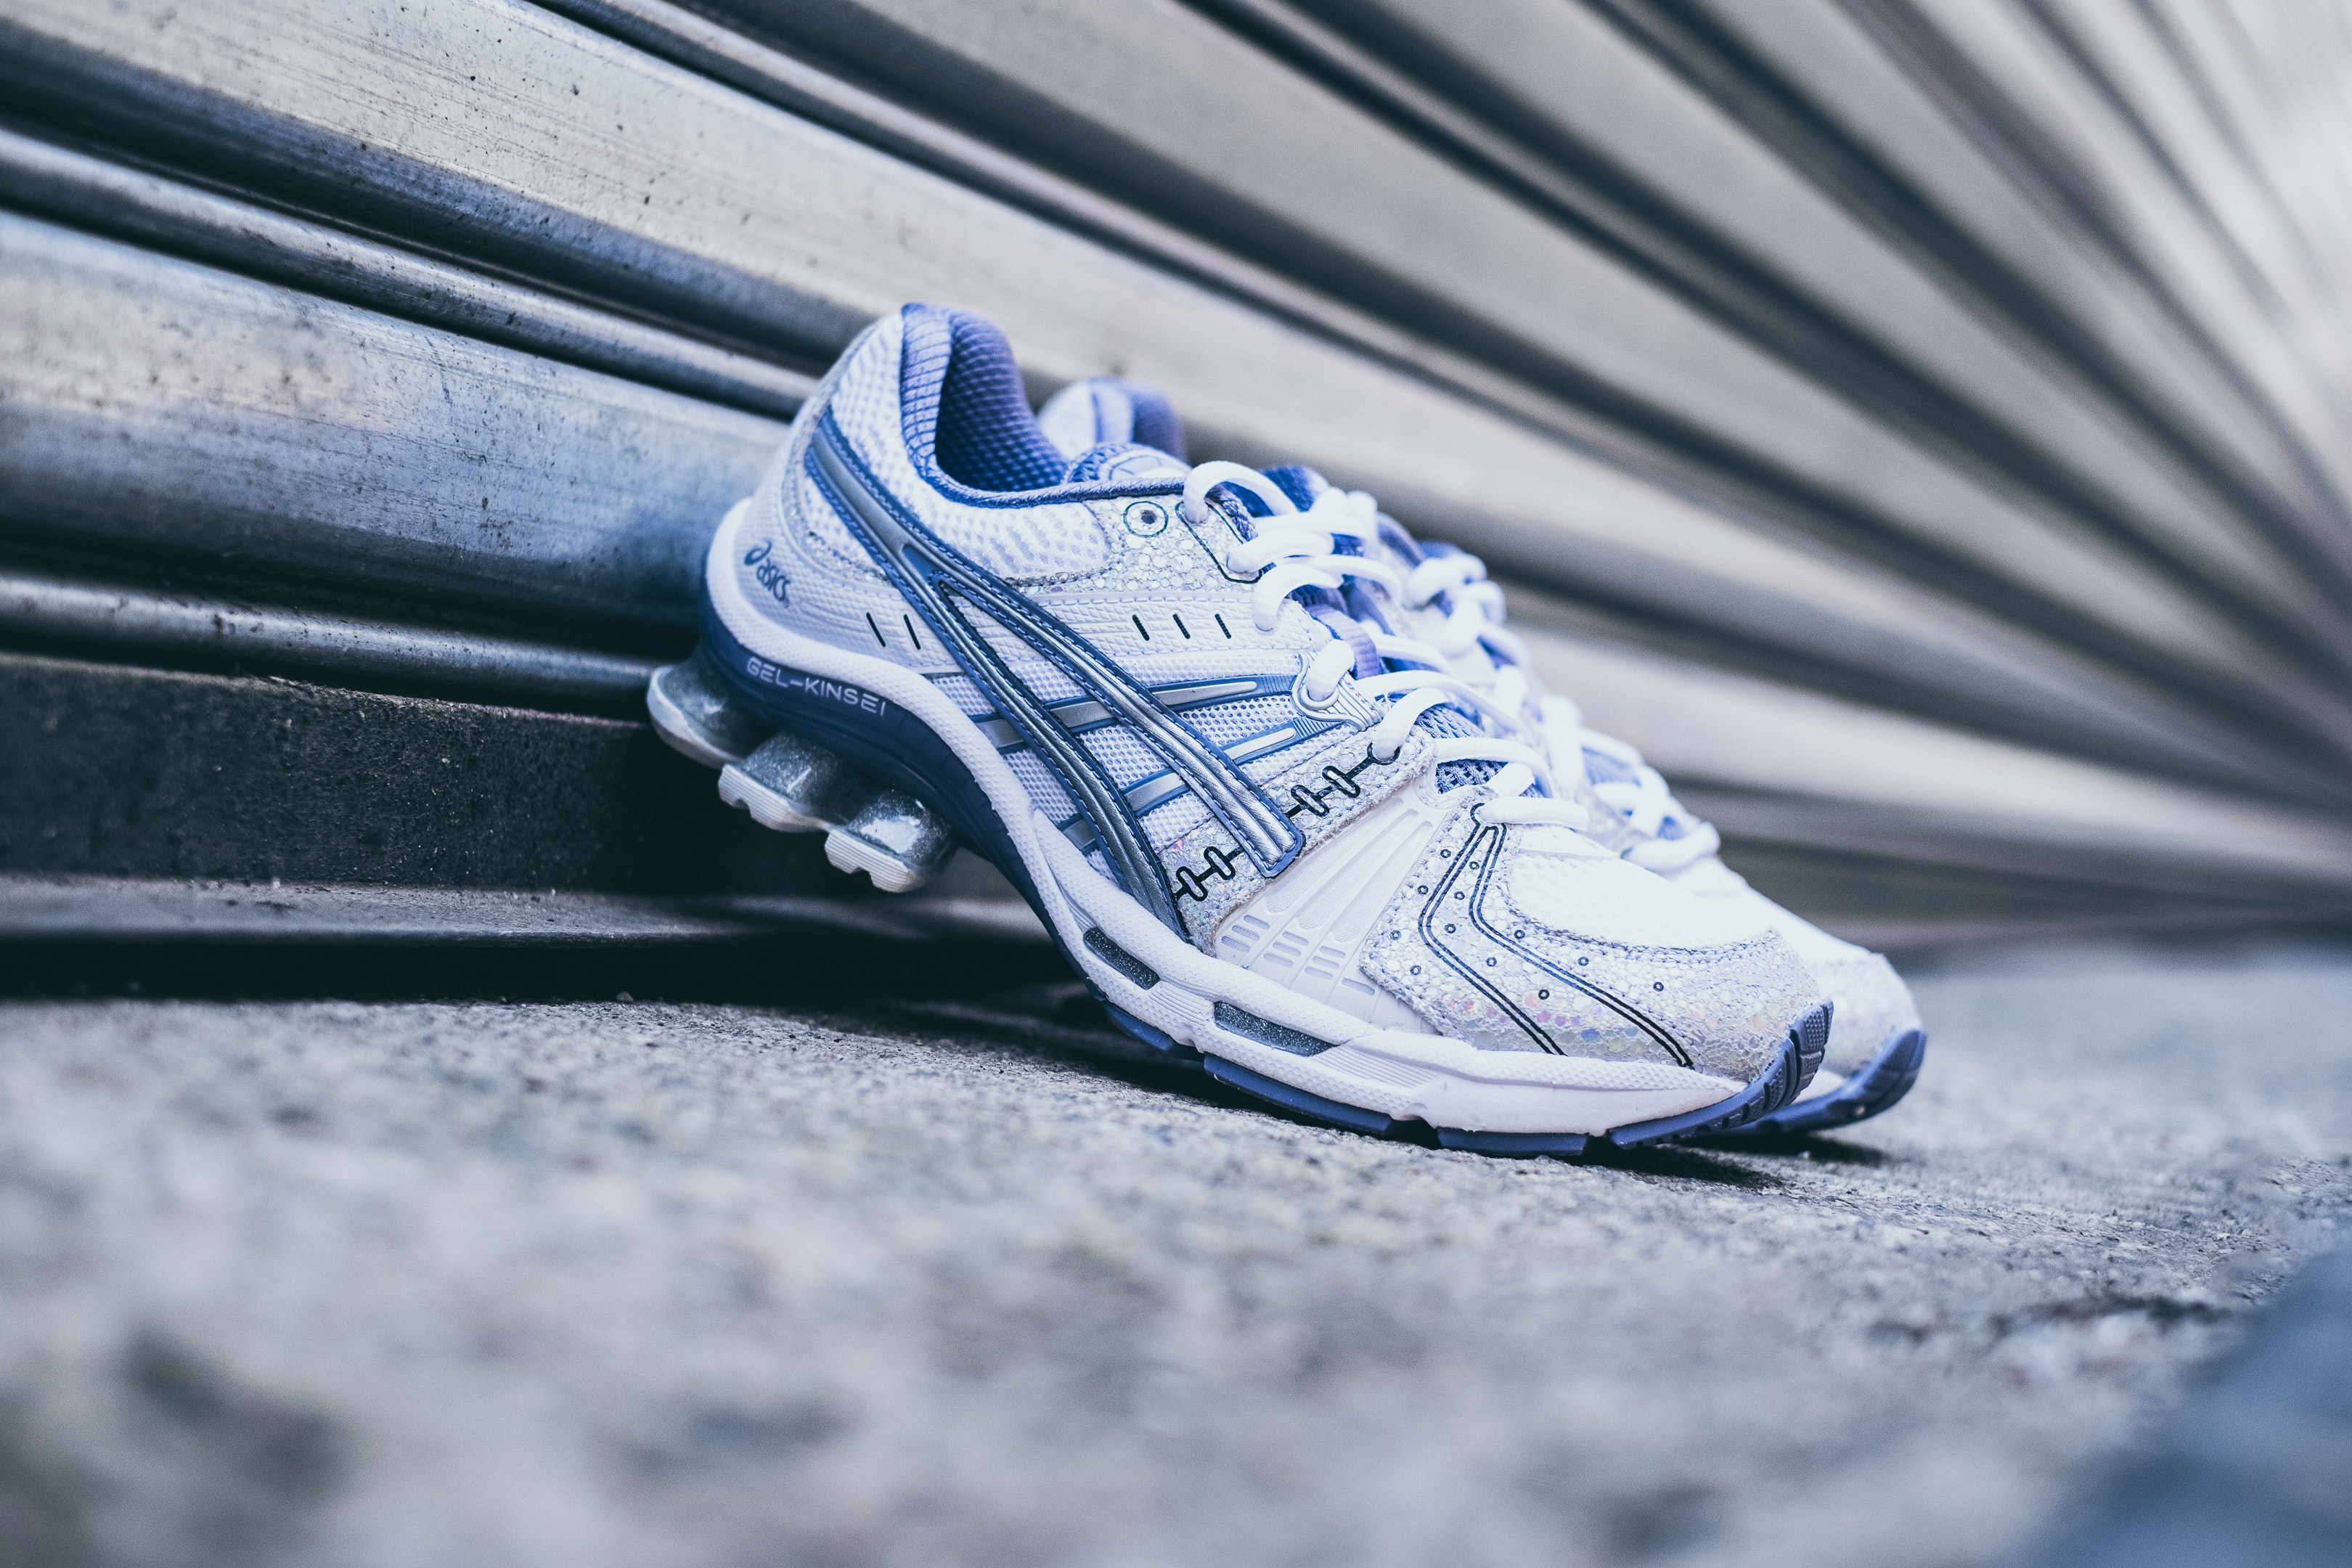
    Not all feet and shoes are created equal. The main message here is that you need to purchase the right shoe for your foot. Not everyone has to be running in a whizz bang zero-drop shoe! People have different foot shapes, which may require different levels of support. Think about this:- Does the shoe match your foot?
    A flat weak foot may need more support than a strong foot with a higher arch.

    Is the toe box to small?
    The area where your toes sit provide all the shock absorption for your running. If your toes can’t spread, you are increasing the ground reaction forces throughout the whole body chain.

    What is the ‘drop’ of the shoe?
    The drop of the shoe is the amount of change in height from the heel to the toe in the sole of the shoe. Think of it as the ‘heel’ of the running shoe. This height change effects the amount of load transmitted through the foot, calf and lower limb. Typically a ‘Zero’ drop versus ‘10mm’ drop will increase the amount of calf/lower limb strength needed to tolerate your training load.

    Talk to a professional and seek good advice from people that run themselves
    We love the guys at Blue Mountains Running Co. in Glenbrook. Click HERE to visit website 

  4. Recovery, Hydration & Nutrition:

    Everyone knows the power of sleep. New research suggests if you’re getting less than 7 hours sleep per night, you’re putting yourself at risk of injury. So.. put the phone down, turn off Netflix and get some sleep!Adequate nutrition and hydration is imperative for good performance, lowering injury risk and aiding in tissue recovery. This is especially important for bone health and reducing stress related injuries.


  1. 80:20 – Training variability and terrain:

    Training variability is important, but can lead to injury. The 80:20 rule means that 80% of your total training time should be completed at an easy to moderate effort, 20% should be completed at a more intense level. Runners often fall into the trap of running the easy runs too fast, adding hills repeats and sprints to their training sessions. This causes the pendulum to swing and all of a sudden 60-70% of their training is now in the hard intensity zone, thus increasing their injury risk.


Got a question about an injury, shoot us a message or book a session online here.


Written by Patrick Lincoln


(Physiotherapist)


ACL Rehabilitation & Recovery

2020-10-07Physio Tips No Comments

ACL Injury & Rehabilitation Explained

Firstly what is an ACL and why is it important?

The anterior cruciate ligament aka ACL is one the main ligaments joining your thigh bone to your shin bone. This inherently keeps the knee very stable so we can jump, run and change direction in a sporting context. The ACL’s job is to stop the knee hyperextending, rotational control and a degree of proprioception for our knee.

What causes an ACL injury?

  • A twisting movement of the knee on a stationary foot is very common.
  • Knee hyperextension can cause injury.
  • Non contact causes account for the majority of ACL ruptures.
  • Females are at greater risk.
  • Higher prevalence in sports requiring sprinting, pivoting, decelerating and jumping.

What are the symptoms of an ACL rupture?

  • A audible pop is present in some cases (not always).
  • Immediate joint effusion and swelling.
  • Sudden onset of pain that eases afterwards. Most people can walk on a ruptured ACL with little to no pain.
  • Night time symptoms in the first 24 hours.
  • Knee joint stiffness due to swelling and pain.

How do you Diagnose an ACL rupture?

A Physio will listen to your story and then assess your knee with series of tests. Imparticular the Lachmans test, the pivot shift test or the lelli’s test will be used to clinical diagnose the ACL rupture.

If the Physio feels the ACL is ruptured an MRI will be performed to confirm the diagnosis and assess any other structures that are injured for example: Medial meniscus, medial ligament and any cartilage or bone involvement.

Does every ACL injury need Surgery?

This space is ever evolving in modern sports medicine. Generally conservative management was only used in the older population who had retired from their sporting days. Surgery was the once the only option for younger people wanting to play sport again. Yet, there is a growing body of evidence that rehab based management of an ACL may have the same benefits of the surgery itself.

What does the ACL rehab process involve if I have surgery?

An approximation of the rehabilitation process involves:

  1. Day 0-14
    – Manage the knee swelling.
    – Restore knee extension range of motion.
    – Ensure good quadriceps activation.
    – Normalise the walking gait cycle.
  2. Week 2-6
    – Ensure the above is completed diligently.
    – Quadricep strengthening in various positions.
    – Restore basic movement patterns: Squat, quadricep squeezes in standing and walking practice.
    – Begin hamstring strengthening. Being mindful if you have had a hamstring graft for your ACL.
    – Stationary Bike if pain, range and swelling allows.
  3.  Week 6-12
    – Start further strengthening work.
    – Loaded Strength Exercises: Calf raises, hamstring work, squats, leg presses, modified step up work.
    – Ensure Knee range is perfect and knee is not swelling.
  4. 12-16 weeks
    – If KNEE has good quads, no swelling, terminal knee extension and single leg controls is adequate we can start a return to straight line running plan.
    – Strength work continues throughout the whole process.
  5. 4 months to 6 months
    – Be nice to your ACL this is where people get cocky.
    – Slowly building running load into your legs and keep it to straight lines.
    – Advance single leg drills and stability work.
  6. 6-9 Months
    – Learn to get your springs back.– Learn to land, hop and get really good dynamic control.
    – Start testing muscle groups with specific measures to see right and left differences.
  7. 9-12 months
    – Cutting and directional running changes.
    – Add external distractions with sport specific rehabilitation.
    – Ensure a very thorough return to sport testing protocol.


Recovering from an ACL injury takes time and a lot of hard work. You as the patient are doing all the work with this recovery and it takes discipline and patience to do it well. New research suggests the longer we stay out of sport the lower the likelihood of re-injuring the ACL again. A minimum of 12 months is recommended by most Surgeons.


Any questions about an injury shoot us a message or book a session online here.


Written by Patrick Lincoln


(Physiotherapist)

Top 10 ways to finish the Ultra-Australia injury FREE!

2020-07-15Physio Tips No Comments

The Physio Depot’s top 10 ways to finish the UTA injury FREE!


  1. HAVE A TRAINING PLAN
     – ‘If you fail to plan, you are planning to fail’
    – Get to know what training volumes and duration your body can handle. Some people can pump out 100km weeks all year round without a niggle, others will run a 50km per week and be broken for months.
    – Get to know YOUR body’s capabilities and training schedule not someone elses.
    – Plan what you can actually achieve and be realistic with your lifestyle.

  2. GET ON THE COURSE
    – Try make your training specific by getting on the course if you have that luxury.
    – Breakdown the sections as this helps mentally on the day of knowing what’s to come.
    – If you can’t run the course try and find places where you can get some vertical elevation. It will be hard to find similar elevation profiles hence why the event is held in the Blue Mountains. 

  3. STRENGTH TRAIN 1-2 TIMES PER WEEK
    – Be consistent with strength training each week.
    – Focusing on all the big engines of the body: Quadriceps, calf, hamstring, gluteals and core muscles.
    – Don’t be afraid adding a little weight. Adding stress to your system is great cross training tool that will really help with all those stair and hill climbs. 

  4. GET TIME ON YOUR  LEGS
    – Be on your legs consistently. All your runs do not have to be long and arduous, but you do have to be consistent with your training.
    – An injury is calling with inconsistent weeks of training and then trying to ‘catch up’ on training.
    – This does not work. It will cause overuse injuries.
  5. RECOVER RECOVER RECOVER
    – Sleep and recovery is paramount to quality training. Schedule it like your training runs.
    – It’s helpful to recover from long runs with cross training like swimming or bike riding.

  6. YOU ARE WHAT YOU EAT AND DRINK
    – Nutrition is key to keeping your body nourished for all your training. Careful not to overeat now you’re running like Forest Gump as some people actually gain weight.
    – Replenishing nutrition stores after your long runs is important.
    – Don’t forget water – Keep a water bottle with you all day everyday.

  7. GET VERTICAL ELEVATION IN YOUR LEGS
    – The 100km UTA event as 4,400m of climb and 4,400m of descent. That’s a lot!
    – The only way to get through this is to start loving hill work, stair climbs and more hill work.
  8. 80% OF YOUR TRAINING SHOULD BE AT AN EASY EFFORT
    – A common misconception is that you need to train hard all the time. Yes – parts of your training can be hard but only 15-20%. This may include hill repeats, speed work or fartlek runs.
    – To avoid injury make 80% of your training easy to moderate. 

  9. GRILL YOUR QUADS ON SOME DOWNHILL
    – The quadricep complex work extremely hard as your brake when running down hill and are prone to exploding if you have not trained running downhill enough prior to this event.
    – Be sure to add down hill running and downstair work in your training program.
    – If you’re a local – Kedumba will do the trick!

  10. STAIRS STAIRS AND MORE STAIRS
    – What comes up must go down so get training.
    – This one is pretty straight forward – To finish this event you must learn to love stairs.


Any questions about an injury shoot us a message or book a session online here.

For more information regarding the Ultra-Australia Click Here

Written by Patrick Lincoln


(Physiotherapist)


What are the ways to prevent injury when returning to sport?

2020-06-25Physio Tips No Comments

What are the ways to prevent injury when returning to sport? 


As sport returns and lockdown rules are starting to ease, sportspeople and weekend warriors are chomping to get out there again!


  • There is always a risk of injury in returning to the sport after an extended period of time off. This is particularly relevant with the additional closure of gyms, and for those who have been moving less than ever by working /studying from home over this period.
  • With decreased activity or training, it’s not just our fitness or muscles that deconditions… The bones, tendons, and joint surfaces also lose strength, which puts you at a higher risk of injury.
  • These changes are exaggerated for children who continued to grow during the lockdown period, there can be dramatic changes in body mass, since they last played a sport, especially in adolescents.


Here are our tips for returning to sport/training WITHOUT getting injured!


SLOW AND STEADY WINS THE RACE

Increase your training volume steadily and slower than you think. Your body takes time to adapt to certain training load. It’s tempting to go back into our old routines straight away, but

start at about 75% of your training load and intensity, and gradually increase this slowly week by week.


GET SOME STRENGTH WORK IN AROUND YOUR SPORT

Chances are over the last few months the muscles that support and protect your joints aren’t as strong as they were pre-lockdown.

Targeted preventative strengthening programs to supplement your training will help reduce the likelihood of overuse and non-contact/contact sporting injuries, and it is a great way to improve your performance!

For sports that involve sudden changes of direction (soccer, football, netball) prioritizing single-leg strength and control plays a huge part in injury prevention.

RECOVER RECOVER RECOVER

Recovery is as important as the training itself, the time spent recovering is when your muscles are rebuilding, your tissues are getting stronger and tendons becoming robust to sustain more training. Start with a rest day between every training session. Initially, you will feel like your body can keep training, but it may catch up with after a few weeks of consistent training.


USE A PROFESSIONAL TO GUIDE THE RETURN TO EXERCISE, SPORT OR ACTIVITY

Like anything using a Personal Trainer or Physio to help guide your return to exercise can be important to returning without getting injured and performing better! Aside from providing structure and direction to your training program, it will provide accountability to your training and goals.


Any questions about an  injury shoot us a message, give us a call on (02) 4751 9127

or book a session online here.

Written by Kieran Fercher

(Physiotherapist)


Help – I’ve got shoulder bursitis!

2020-06-02Physio Tips No Comments


Shoulder Bursitis

What is Shoulder Bursitis?

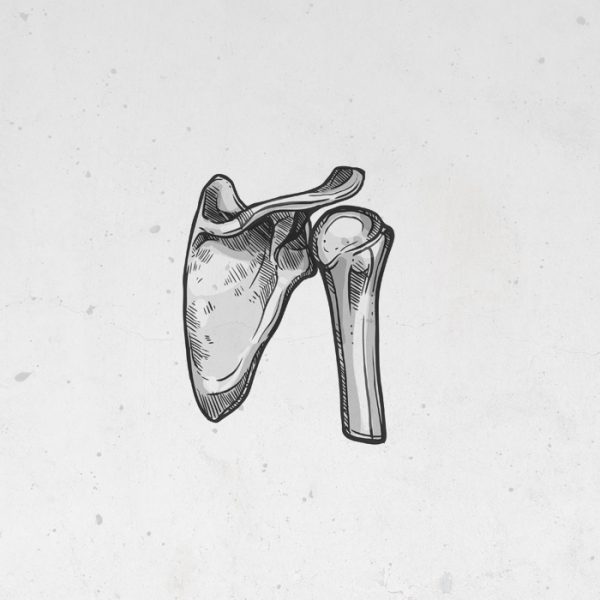
The bursa of the shoulder is a fluid filled sac that exists to reduce joint friction between the shoulder blade and the top of the arm bone. With good shoulder mechanics the bursa slides and glides within the shoulder and creates a perfect synergy.


In the diagram above we can see the bursa is enlarged due to swelling which can happen gradually over time or if the shoulder sustains a specific trauma. The problem now is the shoulder starts to wedge up against the inflamed bursa causing further pain, poor movement and bursitis.


The cycle begins….

–> POOR MOVEMENT OR SHOULDER INJURY
–>BURSITIS
–> PAIN
–> MORE POOR MOVEMENT
–> MORE BURSITIS
–> MORE PAIN


How do I know if I have shoulder bursitis?

  • Pain in the shoulder, upper aspect of arm or bicep region.
  • Pain with lifting arm above shoulder height.
  • Pain reaching behind your back eg. Doing up belt, tucking shirt in or doing up a bra.
  • Pain sleeping on that shoulder.
  • Difficulty getting dressed or arm into a jacket.
  • Pain that is sore through movement but disappears once you reach the top of the movement.
    This is referred to as a painful arc.


How long does it take go away?

  • There is no quick fix for shoulder bursitis.
  • Clinically it can take up for 4-6 weeks for an initial improvement of inflammatory symptoms,
  • Full recovery will take up 12 weeks.
  • To treat this condition well you need to re-train how the shoulder is behaving which causes the ‘bursitis’ in the first place.
  • We look at the bursitis not as the condition but the symptom of a grumpy shoulder.


Will a cortisone injection help shoulder bursitis?

  • In SOME cases a cortisone injection is necessary to provide a rapid change to one’s symptoms in order for them to do the rehab well.
  • Without some form of active rehabilitation a cortisone injection can be a short lived exercise, with pain often returning upon the resumption of normal activity.


How can Physio help shoulder pain?

  • You need to settle down the initial inflammation using a variety of methods.
    – Massage & release work
    – Dry needling
    – Taping
    – Anti-inflammatory medication
    – Education regarding: Ergonomics, sleep position, postures and exercise modification
  • Exercise therapy is key to a long term solution.
    – Organising shoulder mechanics and re-training muscle function.
    – Mobility exercises targeting muscle tightness and imbalance around the shoulder girdle.
    – Gradual overload of muscle system back into a regular strengthening routine.
  • Designing a shoulder friendly gym or home program to work on


We love treating all types of shoulder injuries at The Depot and you are in good hands with all our experienced staff members!


Any questions about an  injury shoot us an email or give us a call on (02) 4751 9127


Need an appointment –> BOOK HERE! 

Written by Patrick Lincoln

(Physiotherapist)

Physio Depot’s top tips to help acute neck pain!

2020-04-28Physio Tips No Comments


I just woke up…
Now I cannot turn my head at all..
and it hurts like hell… HELP!
Sounds like a Wry Neck!


A wry neck is one of the most common neck issues we see in our community. It’s characterised by severe limitation in neck movement and excessive muscular spasm. And it hurts…. A LOT!

What causes this reaction is trivial movement or a sustained position of your neck eg. sleeping in a car or twisting your neck quickly for something. The facet joints of your neck lock up due  excessive spasm in the surrounding muscles causing pain and loss of movement.

Good thing is they don’t last long with proper management and the quicker you restore that movement the quicker the pain dissipates.

Our top tips to you fix your wry neck?


1. Get moving as soon as possible!

  • The longer we wait to start moving the longer it generally takes to resolve.
  • It will be sore but trying to move the neck in the directions that are less painful is a good start.
  • It’s very rare for all directions of movement to be severely limited.

2. Heat packs will be your best friend 

  • Keeping heat packs applied regular or hot showers is a very effective way to limit the amount of muscular spasm.
  • Ensure you don’t burn yourself but there is no limit to how much you can do this.
  • The quicker the muscle spasm settles down the quicker the neck movement will be restore.

3. Gentle PNF Stretches (We will explain what that is!)

  • Gentle muscle contractions and movement will help this resolve quickly.
  • Find a spot on the floor.
  • Use your hand to create a pressure against your hand – Do a little contraction.
  • Let your head fully relax.
  • Then try and turn your head a little bit. Repeat this process as far as you can. (You can see a video on our insta or facebook page)

4. Seek treatment as soon as possible

  • The quicker you restore your movement the better and Physio can help with this immediately.
  • Massage treatment to settle muscular spasm.
  • Joint mobilisation to restore joint movement.
  • Advice, education and reassurance surrounding your condition.
  • Exercises to help you manage this at home so you get better faster.


If you have any questions shoot us a message or book an appointment online!


Any questions about an  injury shoot us a message, give us a call on (02) 4751 9127

or book a session online here.

Written by Patrick Lincoln

(Physiotherapist)


Helpful tips for working at home!

2020-04-08Physio Tips No Comments


Rather than our usual ergonomic office set-up, working from home during self-isolation means many of us are spending our days slouched in bed with our laptops or working from the kitchen table, and are moving less than ever throughout the day.

These prolonged hours of these often slouched, and static postures can result in significant discomfort.
Setting up a work space at home that considers your posture and incorporates some simple exercises throughout the day is extremely simple, and will have positive effects on your health, movement and productivity.


Keep your monitor at eye height

The most important aspect of your desk set-up is getting the screen at eye height. Often in the office, people use monitors or stands for their laptops. Though, at home you can use some stacked books to raise the laptop to eye height, then connect a keyboard and use a mouse. This set-up will assist in maintaining your upper back, head and neck in a neutral position, minimising muscle fatigue.


Think about your desk set-up

Though it might be comfortable initially, always avoid slouching on the sofa or lying in bed to do your work. You should always use a solid desk or kitchen table to work from. The height of your chair should be adjusted so your feet sit flat on the floor and your thighs parallel to the floor – you can always use a small step to raise your feet. Your elbows should be able to rest comfortably at a 90-degree angle on the table. If you don’t have lumber support, place a pillow behind your back to support your natural lumbar curvature.

Alternate between sitting and standing

If you can, it’s always best to alternate between working from a sitting and standing position. For those that do not have a standing desk, use your kitchen bench, and again, stack some books to ensure that the laptop is at eye height. Working from a standing position will reduce hip flexor tightness and lumbar spine compression associated with sitting for extended periods of time.

Keep moving

Our bodies are made to move, so our number one tip – keep moving and take regular breaks every 30-60 minutes. Working in any position for an extended period of time will cause muscle fatigue and discomfort, so go for a walk, get some fresh air and reset. We also recommend incorporating some stretches at your desk to decrease joint stiffness, muscle tightness and improve postural awareness.

Try some simple chin tucks, shoulder rolling and seated rotations that can all be done from your desk.


If you have any questions shoot us a message or book an appointment online!


Any questions about an  injury shoot us a message, give us a call on (02) 4751 9127

or book a session online here.

Written by Patrick Lincoln

(Physiotherapist)

We’re open for Business + Online Consultations!

2020-03-24Physio Tips No Comments

COVID-19 + Recent changes to keep you safe at The Physio Depot!


As a community everyone is hurting right now and the best way to act help each other is to support small business, buy a take away coffee and reach out to those you know who are struggling!

As a clinic we are still operating to serve our community with our amazing customer service in the SAFEST way possible!

  •  Extreme hygiene measures
    – Washing hands pre and post every patient
    – We wipe down beds after every treatment
    – Wiping of reception area, chairs and doors regularly 

    – Wiping down gym area and equipment 
  • Social distancing in waiting room 
  • We are a low volume clinic with max 4-6 people here at any one time
  • If you have travelled in the last 14 days – reschedule your appointment 
  • If you are sick, feeling unwell or have a fever – reschedule your appointment 
  • Try to just bring yourself to the appointment rather than the whole family so we can keep an eye on social distancing  


Introducing Telehealth at The Physio Depot 

Online appointments are more relevant to our business more than ever as more people self isolate and restrictions tighten up. It’s perfectly normal to feel anxious, scared and uneasy in these times. With this in mind we are hoping to provide our same friendly physio advice, education, treatment plans and exercise recommendations via online appointments!

We all love hands-on therapy but in fact it is always our goal to quickly transition our patients toward self management so that they can become empowered and in control of their physical health.


Why choose Online Consultations?

  • Anytime and anywhere – All you need is your phone or internet connection.
  • Professional education, advice and management.
  • Personalised management plans delivered with individual goals for your recovery.
  • We send you documents, pictures and videos regarding your rehab exercises.

Is Online Physiotherapy for me?

Online physiotherapy is perfect for you if you fit the following criteria:

  • You have a smartphone, tablet, laptop or computer with a video camera
  • You have a valid email address
  • You require ongoing education, advice and exercise progression but can’t make it to our physical location
  • You are unable to make it to a physical consult due to a busy lifestyle but still need some things you can do to make progress on your physical wellbeing
  • You would like guidance on your exercise technique and self treatment program
  • You want to know what your problem is and whether it is important to have it assessed in further detail at our physical location
Do I need to be good with computers to use this service?

Not at all! Our video consultations are hosted by Coviu which is incredibly user friendly. All you do is click a link sent to your email and then your done 🙂

Can I claim Online Physiotherapy sessions under my private health fund?

Please check with your specific provider – It’s a mixed approach from health care providers. Given the current climate watch this space as it will change quickly!

What about Medicare EPC and NDIS coverage?

Currently Medicare does not cover physiotherapy under it’s telehealth scheme but this is currently being pursued closely by the Australian Physiotherapy Association in the midst of the COVID-19 pandemic.


If you have any questions shoot us a message or book an appointment online!


Any questions about an  injury shoot us a message, give us a call on (02) 4751 9127

or book a session online here.

Written by Patrick Lincoln

(Physiotherapist)


WHAT IS HIP IMPINGEMENT?

2020-03-12Physio Tips No Comments

WHAT IS HIP IMPINGEMENT?


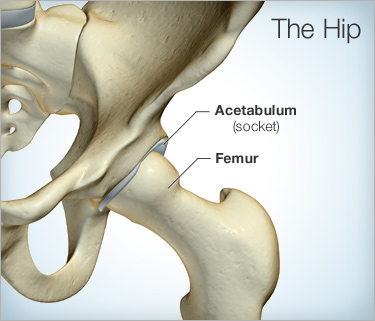
Femoroacetabular impingement (FAI), also known as hip impingement, is a movement or structural problem of the hip which results in the catching or squashing of cartilage/tissues in the hip joint between the Sockey (acetabulum) and thigh bone (femur).


What causes impingement?


People with hip impingement often have variations in the shaping of the ball-and-socket hip joint. (this may be a bony enlargement on the head of the femur or a deeper hip socket). This variation may be genetic or may have developed over time as an adaptive response to repetitive and large hip movements during adolescense. This is common in certain sports/athletes that involve repetitive kicking in front of the body, and extreme flexibility (football, soccer, dancers, gymnastics, martial arts).

Over time, repetitive “bumping” or impingement of the thigh bone on the rim of the socket during certain movements leads to cartilage and labral irritation. Hip impingement often presents following an increase in training volume, combined with weak and tight muscles around the hip, which over time disrupts the natural glide and roll movement of the femur within the hip capsule.


Common symptoms:


Hip impingement generally results in hip stiffness, muscle pain, weakness and decreased performance.

Often including:

  • Deep aching pain in the groin + outside of hip
  • Irritated by movement such as deep squatting, stairs, lunges, kicking movements and running
  • Pain with prolonged sitting
  • Night pain
  • Clicking, catching and giving way


Treatment:


Fortunately, there are a number of things you can do to help relieve your hip pain and get you back on track! This is beginning with modifying activities, stretching/mobility work, and a strength/stability rehab program.

Every person with hip impingement presents differently and needs an individualized approach to their rehab. Have fun getting strong!


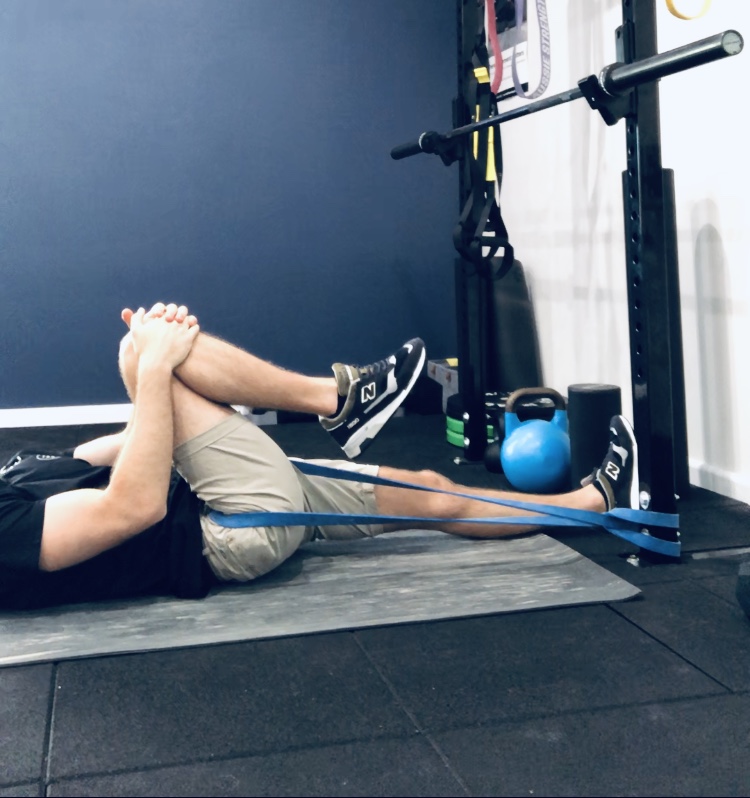
  • Restoring hip movement – There is a challenge of balancing restoring hip movement without increasing symptoms. This can start by gently working on restricted movements within a comfortable range. An exercise band around the upper thigh is used to increase joint space and improve the pain-free hip movement. 

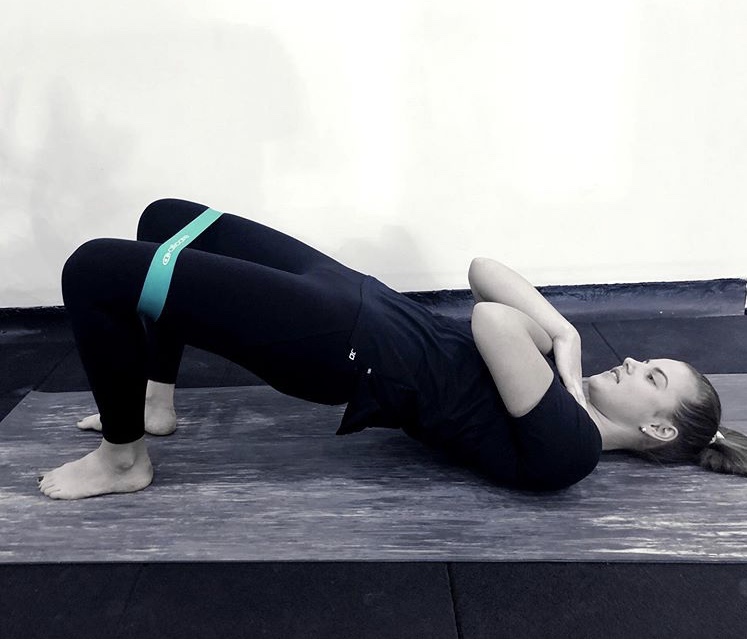
  • Strength of the gluteal muscles  The glutes help support the hip and pelvis through dynamic movement, and assist the thigh bone to move freely inside the hip joint without jamming up on the front of the hip and causing pain. 
  • Releasing tight muscles  this commonly includes foam rolling the gluteal/deep hip rotator muscles which will help free up natural hip motion. 

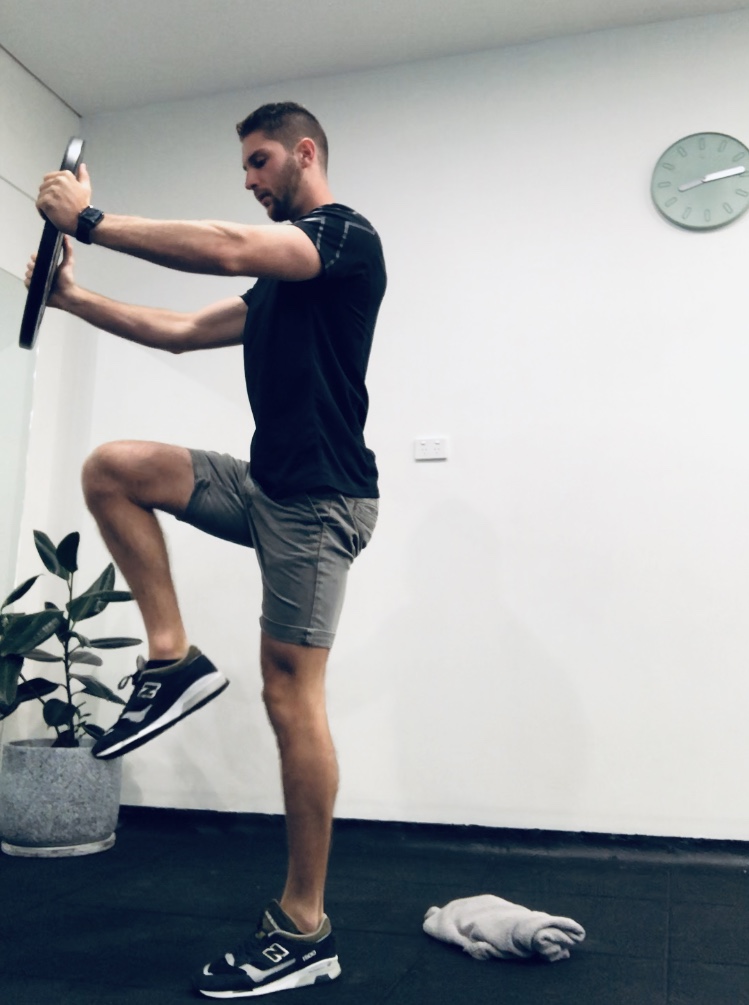
  • Improving balance and control of hip movement – Once hip motion and strength has been restored, improving the control of the lower limb is essential to ensure you move/perform well through the movements that are essential to your goals!


If you have any questions shoot us a message or book an appointment online!


Any questions about an  injury shoot us a message, give us a call on (02) 4751 9127

or book a session online here.

Written by Kieran Fercher

(Physiotherapist)

MYTH BUSTING SQUATS!

2020-02-13Physio Tips No Comments

MYTH BUSTING SQUATS!

The squat is an exercise that is functional to everyday life. Naturally we should squat to pick things up from the floor, lowering onto a chair. Our modern day lives have meant that varying movement patterns have been formed during a squat which can place strain on joints and muscles.

There is a strong belief that the knees should never move over the toes when squatting. The knee is only a hinge joint, so it will only move forward based on movement that goes on at the ankle and hip. Instead of focusing so much on what is going on at the knee, we should really be focusing in on the hip and ankle joint when we squat.

  • Limiting forward knee travel simply SHIFTS THE STRESS from the KNEES to the HIPS/LOW BACK.
  • In order to reach FULL depth in the squat the KNEES almost ALWAYS have to move forward past the toes.
  • EARLY forward knee travel during a squat may indicate a mobility restriction or poor movement pattern.

Ways to keep you squatting around pain!


What people also tend to forget is that each type of squat is MEANT to have differing amounts of forward knee travel, due to the varying demands placed on the joints of the lower limb due to the different bar or arm positions.

In order of most to least expected forward knee travel in different versions of the squat:

  1. Overhead squat
  2. Front squat
  3. Goblet squat
  4. Back squat
  5. box squat
  6. Wall squat

If you are experiencing pain when squatting, try these variations as you recover!


Knee/Ankle pain

  • Wall squats
  • Box squats

Hip/Low back pain

  • Front squats
  • Goblet squats


How to improve your squat!

Ankle mobility

  • Grab a box and a resistance band.
  • Place the band around the top of the foot.
  • Drive your knee through the midline of your foot to increase ankle range.

Hip mobility

  • Grab a resistance band and place the band around the leg as far up the thigh as possible
  • Move outwards to create a strong pull on the band
  • Get in a lunge position and move the knee in and out

Hamstring flexibility

  • Laying on your back, supporting your thigh at 90 degrees.
  • Bend and straighten your knee until you feel a stretch.
  • Repeat this movement continuously.

Trunk control

  • Try squatting with a weight held straight out in front of you to offset your body weight.
  • This will challenge your trunk control to keep an upright torso.


If you have any questions shoot us a message or book an appointment online!


Any questions about an  injury shoot us a message, give us a call on (02) 4751 9127

or book a session online here.

Written by Kieran fercher

(Physiotherapist)